How to Install a Motorcycle Intercom
Clamp or adhesive, where the speakers actually go, how to route the microphone — and the one shortcut that permanently reduces what your helmet can do for you.
How this is funded: we earn a commission if you buy through our links, at no extra cost to you. It never changes which gear we recommend, and we’ll tell you plainly when to skip a pick. Full disclosure.
Fitting an intercom is a twenty-minute job that most people rush in five, and the difference shows up two hours into the first ride: speakers slightly off the ear so the volume has to be uncomfortable to be audible, a microphone pointing at the wrong part of your face, a cable pressing on your temple, and a control button you cannot find with a glove on.
None of that is difficult to avoid. What follows is the order that works, and one rule that is not negotiable: you never cut, grind or remove any part of the helmet’s impact liner to make something fit. More on that below, because it is the mistake with permanent consequences.
Before you start
- Charge the unit while you fit the hardware. Nothing is more annoying than finishing the install and finding you cannot pair it.
- Work at a table in good light, with the helmet in front of you. This is a fiddly job done badly on a garage floor.
- Lay out the box contents and identify which parts you will not use. Every system ships a clamp mount and an adhesive mount, and usually both a boom and a wired microphone. You need one of each pair.
- Read which mount your helmet needs. Run a finger along the bottom edge of the shell on the left side. If there is a gap between the shell and the comfort liner, the clamp will fit. If the trim is continuous, you are on adhesive.
Step 1 — Fit the mount
Clamp mount
The clamp slides into the gap at the bottom edge of the shell with the backing plate inside and the mounting plate outside. Position it on the left side — that is where every system is designed to sit, and it keeps your throttle hand on the bar — low enough that it does not foul the shield mechanism, and far enough forward that you can reach the controls without stretching your arm across your chest.
Do not tighten it fully yet. You will want to adjust the position after the speakers are in.
Adhesive mount
Clean the shell with the alcohol wipe in the box and let it dry completely. Position the base plate, press it down firmly for thirty seconds, and then leave it. Most adhesives want several hours to reach full strength, and hanging a unit on it immediately is how base plates end up on the road.
Do not use adhesive over a vent, over a seam in the shell trim, or on a heavily textured graphic finish. All three reduce contact area.
Step 2 — Fit the speakers
This is the step that decides whether the system sounds good, and the one people spend the least time on.
Peel back the cheek pads or lift the comfort liner to expose the molded speaker recesses in the shell. Fit the adhesive discs into the recesses and press the speakers in. Then — and this is the part that gets skipped — put the helmet on and check where they actually sit. The recesses are molded for an average head. Your ears may not be in the average place.
The speaker should be centered over your ear canal. Off by a centimeter and you will find yourself running the volume higher than is comfortable to hear navigation prompts over wind noise. If the recess does not put the speaker in the right place, the adhesive disc can be moved within the recess, and most systems ship spacer pads to bring a speaker forward slightly.
If the speakers press against your ears — a real problem after an hour — the recess is too shallow for that speaker. Use the thinner speakers some systems offer, or accept that your helmet is a poor match for that unit. Do not solve it by cutting the liner.
Step 3 — Position the microphone
Which microphone depends on the helmet:
- Full-face: the boom microphone, curved round the inside of the chin bar so the tip sits in front of your mouth, level with your lips and slightly off-center so you are not breathing directly onto it.
- Modular or open-face: the wired microphone, taped or velcroed into the chin curtain area. A boom on a flip-front gets caught every time the chin bar goes up and will eventually break.
Both types have a marked side that must face your mouth. Fitting it backwards is the single most common cause of “nobody can hear me.”
Step 4 — Route the cables
Everything runs between the comfort liner and the EPS, down the left side of the helmet. Tuck cables into the natural channels where the liner meets the shell; most helmets have them.
Two rules. No cable should cross the crown of your head, and nothing should press into your scalp when the helmet is on. A cable you can feel at rest is a cable that will be a hot spot in an hour.
Step 5 — Refit, tighten, and test on your head
Press the comfort liner and cheek pads back into their clips — they should snap in, not merely sit. Tighten the mount fully. Then run the check with the helmet on:
- Speakers centered over your ears, not pressing.
- Microphone in front of your mouth, marked side toward you.
- Nothing pressing on your scalp or temple.
- Every button findable with a winter glove on, without looking. If you cannot, move the mount.
- Pair the unit and make a test call before you ride, not at a junction.
The rule that matters more than all of this
Never cut, grind, carve or remove EPS liner material to make an intercom fit. The EPS is the crushable layer that absorbs impact energy by deforming, and it is the reason a helmet works. A pocket carved out for a speaker is a hole in your protection directly beside your temple, and the helmet you certified as protecting you no longer does at that point.
It is a shortcut that circulates in forums because it works — the speaker fits, the helmet feels fine, and there is no visible consequence until the one moment there is. If a unit will not fit your helmet, change the unit. Nothing about an intercom is worth compromising the reason you are wearing the helmet.
The alternative: skip the install
Some helmets have the system designed in from the start, with the speakers, microphone, battery and antenna integrated during manufacture rather than added afterwards. There is nothing to mount, nothing to route, and no fitment question — and because it is engineered as part of the helmet, the speaker placement is right by design. The trade is that you are committed to that system for the life of the helmet.
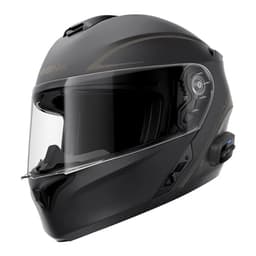
Intercom built in
Sena Outrush R
DOT FMVSS 218A modular helmet with the Bluetooth intercom built in and hidden — no bolt-on module, no wind snag. The US version is DOT-certified and Sena publishes Bluetooth 5.1, four-rider intercom and 18 hours of talk time. The cleanest way to get comms without a separate purchase.
See the Bluetooth helmet rankingPrice as of October 18, 2026. #ad How we’re funded
If you would rather choose the unit and the helmet separately — which is what most riders do, and what gives you the best of both — these are the two universal-mount systems we would fit first.
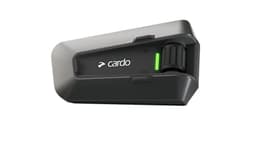
Flagship mesh
Cardo Packtalk Edge
The intercom most serious riders point to: Cardo's second-gen Dynamic Mesh (DMC) self-heals as riders drop in and out, JBL speakers sound excellent, and the magnetic Air Mount is the best in the class. The premium pick for group touring.
See the intercom ranking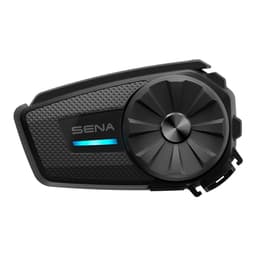
Mesh at mid-tier money
Sena Spider ST1
The value way into Sena Mesh: Open Mesh and Bluetooth in a simpler unit at a lower price than the 50S. If you want mesh's self-healing group audio without the flagship features, this is the entry point.
Compare against the Freecom 4XPrice as of October 18, 2026. #ad How we’re funded
Common problems, and what causes them
- “I have to run the volume at maximum.” Speakers are off the ear canal. Reposition them before you conclude the unit is weak.
- “Nobody can hear me.” Microphone reversed, or too far from your mouth. Check the marked side.
- “My ears hurt after an hour.” Speaker recesses too shallow for those speakers. Use thinner ones or spacer pads.
- “The mount rattles.” Clamp not tightened fully, or adhesive applied over a vent or a textured surface.
- “I cannot work the buttons in gloves.” Mount position, not glove thickness. Move it forward and down.
How to read our safety notes. We have not crash-tested any of this gear — nobody honestly can on a review budget. Every helmet and armor pick names the certification the maker publishes (DOT, ECE 22.06, SNELL, or a CE level), which we read from the listing on a dated visit. Certification is the floor, not a guarantee; fit and condition matter as much as the sticker. What the standards actually mean.
Frequently asked questions
Can you install an intercom on any motorcycle helmet?
Almost any modern helmet, yes — most now include molded speaker recesses and a gap at the bottom edge for a clamp mount, and every major system ships with an adhesive alternative for helmets that do not. The exceptions are helmets with unusually shallow or absent speaker pockets, where the speakers end up pressing against your ears. Check the depth of the recesses before you order, because that is the specification that decides comfort over a long ride.
Should I use the clamp or the adhesive mount?
The clamp, if there is a gap between the shell and the comfort liner on the left side that it can slide into. It is more secure, it is removable without residue, and it does not depend on the shell's surface finish. Use the adhesive base plate where there is no gap, where the shell curvature stops the clamp sitting flush, or on helmets with a full lower trim. Clean the shell with the supplied wipe first and leave the adhesive to cure before hanging weight on it.
Where should the speakers go in a helmet?
Directly over your ear canal, not in front of it or behind it. The single most common installation error is fitting the speakers into the recesses as found and never checking the alignment with the helmet on your head — the recesses are placed for an average, and helmets sit differently on different heads. Put the helmet on, feel where the speakers sit relative to your ears, and move them if they are off. A well-placed budget speaker sounds better than a badly-placed premium one.
Can I cut the helmet liner to fit the speakers?
Never cut, grind or remove EPS liner material to make a speaker fit. The EPS is the crushable layer that absorbs impact energy, and removing material removes protection at exactly that point — a hole cut for a speaker is a hole in your protection right beside your temple. If a speaker will not fit, use thinner speakers, use the adhesive spacers to redistribute the pressure, or change the unit. Do not change the helmet.
Where does the microphone go on a modular helmet?
Use the wired microphone rather than the boom, and position it in the chin area behind the chin bar, pointing at your mouth. A boom microphone on a flip-front gets caught every time you raise the chin bar and eventually breaks. Most systems ship both types in the box for this reason. Check which side of the microphone is marked to face your mouth — fitting it backwards is a common cause of complaints that nobody can hear you.
Will an intercom affect my helmet's certification?
A properly installed universal-mount system does not modify the helmet, so nothing about its certification changes — the unit clamps or adheres to the outside and the speakers sit in recesses the maker molded for them. What does compromise the helmet is cutting the EPS to make something fit, or drilling the shell. Both remove protective material from a certified structure, and neither is recoverable. If you want to avoid the question entirely, buy a helmet with the system designed in.
Sources
- NHTSA — How to Choose the Right Motorcycle Helmet — NHTSA consumer guidance on DOT certification and spotting novelty helmets (accessed July 21, 2026)
- 49 CFR 571.218 — FMVSS No. 218, Motorcycle helmets — The US federal helmet standard: peak-acceleration, penetration and retention requirements; applies to all on-road motorcycle helmets (accessed July 21, 2026)
- UNECE — Vehicle Regulations (UN Regulation No. 22 / ECE 22.06) — The UN regulation behind ECE 22.06, which added rotational/oblique-impact testing over 22.05 (accessed July 21, 2026)
Keep reading
How to choose a motorcycle intercom
Network type, speaker fit, mounting and controls you can work in gloves — the four things that decide whether it gets used.
Read the buying guideBest motorcycle intercoms
Mesh and Bluetooth systems ranked for group touring, pillion use and value.
See the intercom picksBest Bluetooth motorcycle helmets
Helmets with the intercom built in — no bolt-on module, no installation.
See the helmet picksMesh vs Bluetooth intercoms
Why a Bluetooth chain drops the whole group when one rider turns off, and what mesh changes.
Read the explainer